
Getting realistic renders in Blender 3.0 is not that difficult. Blender 3, and the cycles render engine make it pretty simple to get started. However, there are some things that you should know before you dive in, and practice with no information.
Materials and textures
It is important that you set the scene up to have the correct types of materials on your model, as well as your environment. I’m including a link for 800 materials that you can use in blender 3.0, and these materials are ready to be used with the new Blender Asset Library.
To get these materials, click here...
HDR Environmental Textures…
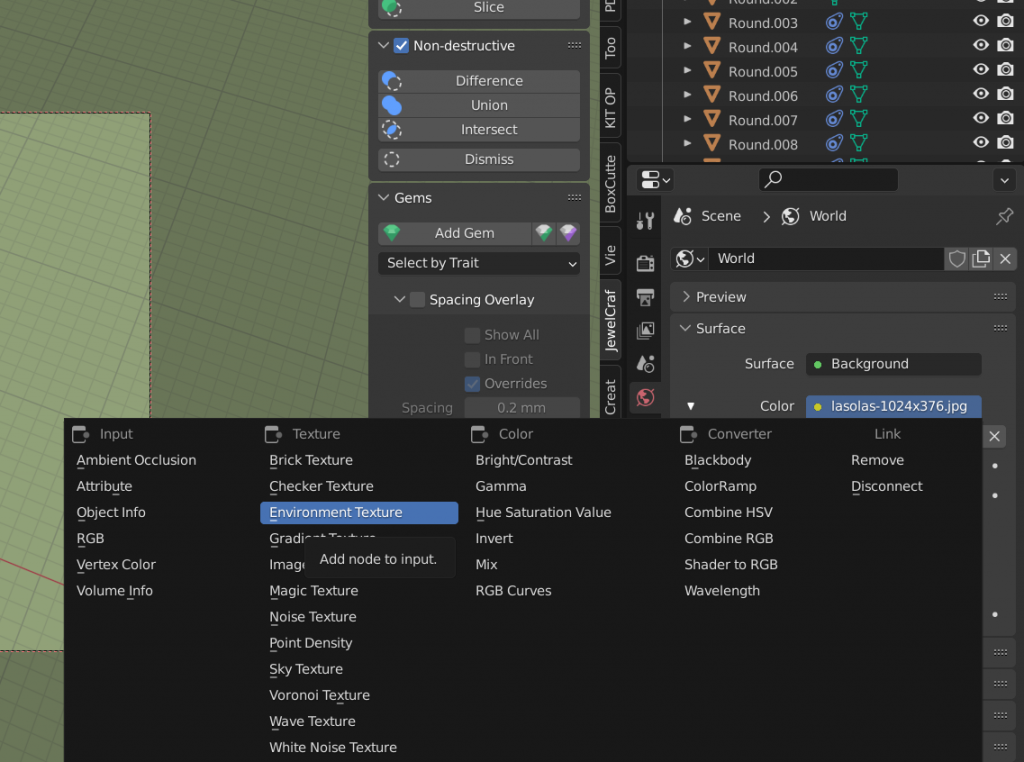
I feel, that it is important to use an environmental HDR texture or Image for your lighting environment. search the internet for some HDR images you can use. Many of them are free to use for what ever you wish, but you should also remember that some images are licensed and you will have to get permission to use them.
Why HDR Images? Simply put, HDR images offer a very nice way to offer better environmental scene color and reflection to your models and renders. The trick is always going to be whether or not you can find the one that makes your renders look better.
Since I’m not using my skills for perfect VFX (video effects), I can get away with a quicker and easier solution to make my models look better and more realistic. Again, setting up the environment helps to make your renders look “more” realistic, and not necessarily perfect. However, they are above what my customer’s expect and I can supply more than adequate images to help my customers visualize what it is they want.
Keep it simple
I know, many of you are going to complain that there are other ways to do this, and get better results. However, I’m not making this tutorial as some two hour long dive deep into settings and obscurity to set up your rendering environment. This is to get you started quickly, with little effort and maximum results.
If you wish, there are many other tutorials that go deep into all the rendering settings, and I have to be honest with you, as a modeler who designs jewelry, it is overkill. This process makes it easy for me to set up my environment, and save my scene as a default blender setting. Always having it ready to go when I need it.

Lighting…
Setting up your scene lighting is also necessary. It allows you to control the position of shadows, reflections and create a much more realistic scene. Play with all the lighting options that blender has until you are happy with the results. Keep in mind also, that not only can you place and aim lights, but you can control the color and intensity of any light in your scene.
Modeling…
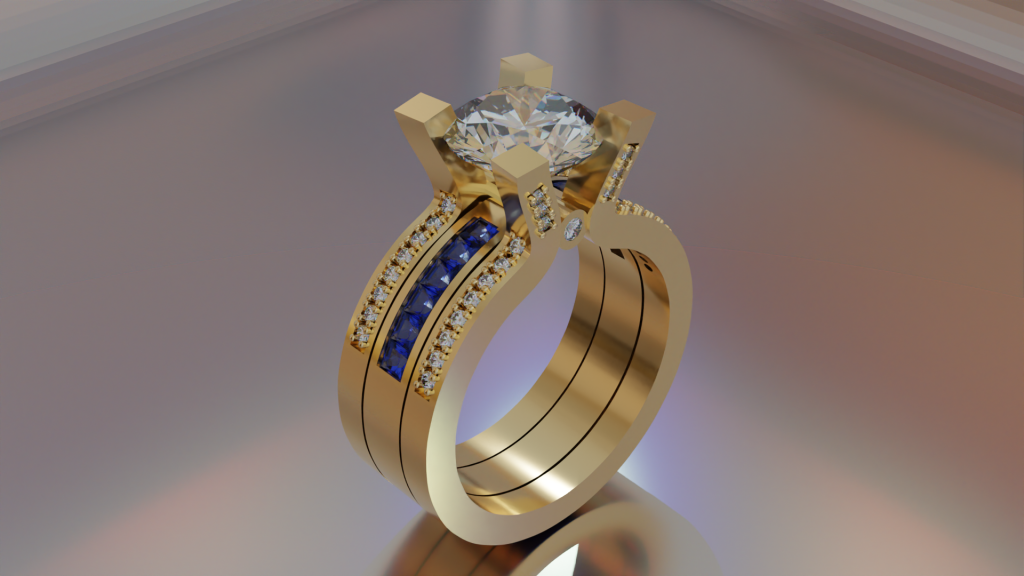
How you model your design is also important. Soft edges, the materials you intend to use, and the shapes of all the parts help to make your design look real. Try to use beveled edges when possible, as in real life, not all things have sharp corners and edges.
The more you model in real life detail, the better your renders will turn out.
Achieving Even Higher Quality…
I’m going to admit something… I think that for me, trying to make a 3d model of jewelry look so real that you feel as though you could reach into the monitor and touch it would be nice… It is, however, beyond my desire. I don’t have the need for it, and I’ve not delved into trying to achieve that level of quality.
If, you are using blender, and want to get to the highest level of rendering possibilities, remember, it is very attainable. Learning every possible setting to set your scene, your environment, and adjustments to your model, can allow you to create an almost endless level of rendering quality.
Like many of you, I too am intrigued by the special effects that I see in so may TV shows and movies. I have come to appreciate the work involved, and the tools used to make these great scenes and effects. Blender is one of the few programs that is available to anyone, that can get you on that road, and if you choose to learn its many abilities, as an artist, you have an almost endless possibility of creative endeavors…
Go Play and Have Fun!